


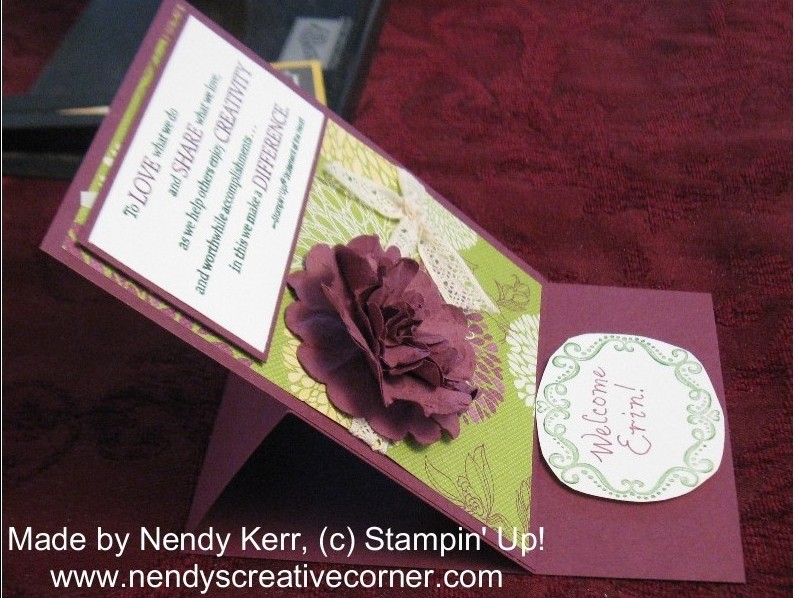
I made this Easel Card for a new member of my group using Floral District Designer Series Paper and a Scallop Punch Flower. Easel Cards are so simple to make and they impress others. Have fun making one of your own!

SUPPLIES:
Stamps: Statement of the Heart stamp (available only to Stampin’ Up! Demonstrators)
I Am (received at the 2012 Stampin’ Up! Convention)
Choose the stamps of your choice
Markers: Rich Razzleberry
Garden Green
Card Stock: Rich Razzleberry
Whisper White
Floral District Designer Series Paper #126919
Punches: 2-3/8″ Scallop Circle #118874
1-3/4″ Scallop Circle #119854
1-1/4″ Scallop Circle #127811
Other: Victorial 5/8″ Crochet Trim #118481
3/16″ Brad
SNAIL
Dimensionals
Glue Dots
Bone Folder
Paper Piercing Tool
INSTRUCTIONS:
1. Cut your Rich Razzleberry card base at 4-1/4″ x 11″. Score and fold at 3″ and 5-1/2″. 2. Cut your Rich Razzleberry card front at 4-1/4″ x 5-1/2″. Cut your Floral District Designer Series Paper at 4″ x 5-1/4″. Also cut a piece of Rich Razzleberry card stock 3-3/4″ wide x 1/4″ taller than your sentiment card stock. (You can do this after you have stamped your Sentiment.)
3. Color your sentiment with your Rich Razzleberry and Garden Green Markers. Stamp on Whisper White card stock. Cut card stock to fit the sentiment (no wider than 3-1/2″) Adhere to the Rich Razzleberry sentiment layer. Adhere in place with SNAIL.
4. Punch 1 Rich Razzleberry Scallop with each Scallop Punch. The following technique is called the “Faux Suede Technique.” Crunch/Roll them up in the smallest little ball you can. Now use your Bone Folder to smooth out the wrinkles and break down the card stock fibers until you can see it separating into two layers. Gently peel the layers apart so you have two scallops. (Note: I found Rich Razzleberry card stock harder to separate than some of the other colors. I ended up punching 2 of each size scallop since they tore when I separated them.) Do this with all your Scallops so you have 2 of each size. Now roll them up into little balls again. Kind of smooth them out. Layer them from largest to smallest and center as well as possible. Use a Piercing tool to pierce a hole through the center. Insert brad of your choice. Crinkle each Scallop Circle as desired to form your flower.
5. Decide where to place the Scallop Flower and the ribbon. Tie the ribbon around the Designer Series Paper. Adhere the Scallop Flower with Glue Dots. Adhere this layer to your 4-1/4″ x 5-1/2″ card front by putting your SNAIL on the Rich Razzleberry card front.
6. Put SNAIL on the 3″ end of the card base. Adhere the bottom of your card front to the 3″ end of your card base.
7. Stamp your sentiment and either cut it out or punch it out. Decide how far back you want the easel part of your card to be. Adhere this sentiment with Dimensional in the position desired to hold up your card front. You now have your Easel Card made.
Enjoy making your own Easel card!
Nendy


